How to Integrate PriceLabs with ZenHost
PriceLabs can send daily rates to ZenHost for the next 720 days, starting from the day of activation.
Feature Availability
See what features work with your PMS. Click here to check which customizations are supported for your platform, so you know what options will be available once your listings are connected.
Step 1: Connecting ZenHost to PriceLabs
- Log into PriceLabs.
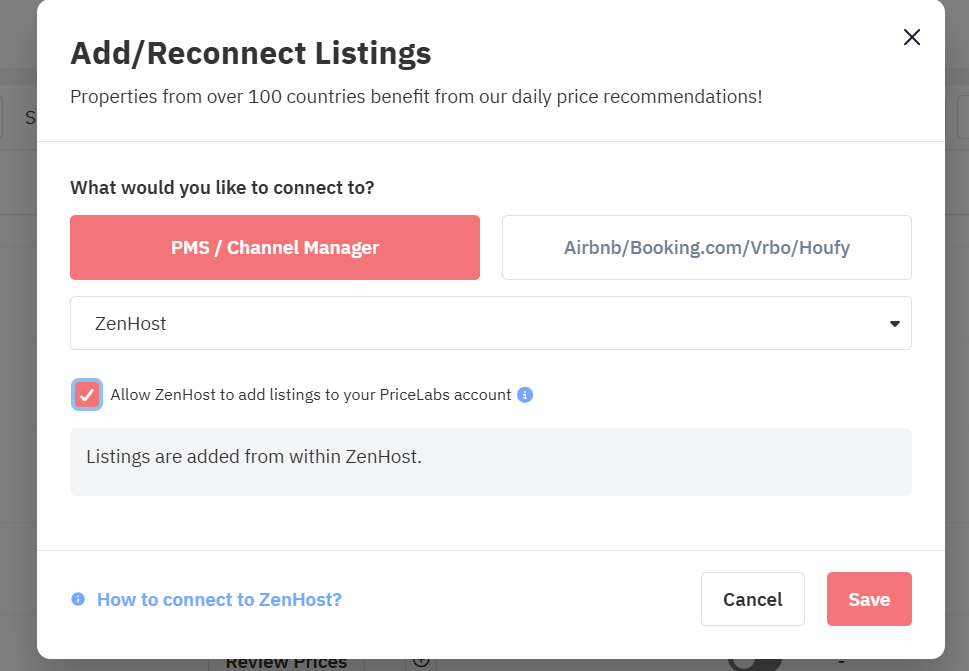
- Click "Add your listings" (if you have no listings) or "Add/Reconnect Listings" (if you already have listings).
- Select "PMS / Channel Manager" and choose "ZenHost" from the dropdown.
- Tick the checkbox to "Allow ZenHost to add listings to your PriceLabs account." Then clickSave.
Step 2: Connect & Setup in ZenHost
Refer to the connectivity guide for ZenHost and follow the steps: https://zenhost.com/docs/integrations/dynamic-pricing-pricelabs
In case of any difficulty reach out to support@zenhost.com.
Step 3: Reviewing & Syncing Prices
- Follow the Getting Started guide to set up your listings.
- Review your pricing and settings in PriceLabs.
- Enable Sync Prices for automatic updates, or click "Sync Now" to push updates immediately.
- Check your ZenHost account to verify updates.
Next Steps
✅ Review pricing and rules regularly.
✅ Join our Intro to PriceLabs Live Training for further insights.
✅ Join our Intro to PriceLabs Live Training for further insights.
✅ With these steps, your PriceLabs-ZenHost integration should run smoothly!