How to Integrate PriceLabs with Barefoot
Integrating Barefoot with PriceLabs allows you to automate and optimize pricing for up to 540 days. Follow this step-by-step guide to set up and sync your listings seamlessly.
Feature Availability
Step 1: Enable PriceLabs in Your Barefoot Account
- Log in to Barefoot and head over to the Partner tab.
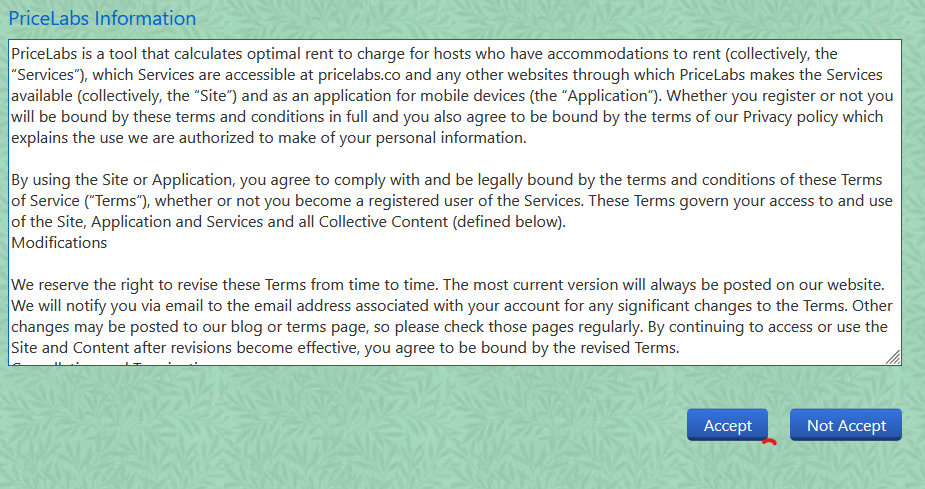
- Select PriceLabs.
- Then, click Accept button for the terms and conditions.


Step 2: Prepare Your Barefoot Account for PriceLabs Integration
Add a Price Class for "PriceLabs"
- Log in to Barefoot and click "Catalog" in the top menu.
- Under "Configure Package," select "Price Classes."
- Click "Add New."
- Enter "PriceLabs" as the Price Class Name and click OK to save.
Assign the "PriceLabs" Price Class to Properties
- Go to the Property Information page in Barefoot.
- Select "PriceLabs" from the Price Class dropdown.
- Click "Update."

Add a "1-Day" Price in the Price Table (Optional)
If the Price Class does not already have 1-day pricing, follow these steps:
- In the Property Information page, scroll down and click "Price Table."
- Click the "+" button to add a new entry.
- Enter "1" for Date Length
- Click OK to save.
- Enter an Initial Price and click OK to save.
This ensures that the 1-day price column is created in the pricing table.
Ensure Price Periods Are Set Correctly
To prevent sync failures, follow these guidelines:
✔ Avoid combined date periods (e.g., 01/01/2024 - 01/10/2024).
✔ Each day should have its own unique price period in the pricing table.
Update Latitude and Longitude for Listings
- Go to Property Information and click "Portal Amenities."
- Enter the Longitude and Latitude for the property.
- Click "Update."
Extend the Pricing Calendar in Barefoot
To match PriceLabs' 540-day pricing calendar, update the settings in Barefoot:
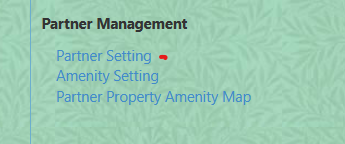
- Navigate to Settings → Partner Settings.
- Select "PriceLabs" from the Partner dropdown.
- Choose "Dates" and click "Edit."
- Update the Date End field.
- Click "Save."
This ensures that PriceLabs can push prices for the full supported duration.
Step 3: Connect Barefoot to PriceLabs
- Log in to PriceLabs.
- Click "Add Your Listings" or "Add/Reconnect Listings."
- Select "Barefoot" from the list of PMS options.
- Enter your Barefoot Company Name and click "Connect."
Your Barefoot listings should now appear in PriceLabs!
Step 4: Set Up a Base Price for Your Listings
Setting a Base Price is mandatory before syncing.
- Click "Review Prices" for the listing.
- Enter a Base Price when prompted and click "Add Base Rate."
- After setting your Base Price, wait a few minutes to allow PriceLabs to create unique price periods in Barefoot for the next two years.
- Verify that each day has a unique price period in Barefoot.
- No duplicate price periods should exist.
- Once confirmed, click Save & Refresh in PriceLabs.
Important Notes for Properties with Existing Yellow Property Prices in Barefoot
If your properties already have yellow property prices in Barefoot, follow these additional steps:
- Ensure that the property prices are correctly set up in PriceLabs.
- In Barefoot, manually delete the yellow property prices for those listings.
- Immediately return to PriceLabs and click Sync Now.
Skipping this step will prevent PriceLabs from successfully pushing rates into Barefoot.
Adding More Properties to PriceLabs
If you're adding new properties to PriceLabs, ensure they are correctly set up in Barefoot before syncing:
- Log in to Barefoot.
- Go to Settings → Partner Settings.
- Search for the property you want to add.
- Select the property and choose "PriceLabs" as the partner.
- Set the pricing period in the dropdown and click Save.
- Return to PriceLabs and re-import your listings.
Next Steps
- Go through the Getting Started Guide to set up your listings.
- Join an Intro to PriceLabs Live Training for a walkthrough of the dashboard and customizations.
- Need help? Contact us at support@pricelabs.co.